Keep Your Sprayer Performing Its Best with a Simple Catch Test
Introduction
Nozzle tips do a lot of the heavy lifting on a sprayer. When they’re worn, damaged, or even a little plugged up, you can end up with streaks, uneven coverage, wasted product, and results that just do not match what you expected. The good news is most nozzle problems can be caught early with a quick routine check, especially a catch test. Here’s a practical walkthrough of why it matters, how to do it, and what to do with what you find.
Why nozzle condition matters
Your nozzle tips control two big things: flow rate and spray distribution. Over time, tips wear and the orifice slowly opens up, which increases output. On the flip side, a nozzle that’s partially plugged or damaged can drop output or mess up the spray pattern. Either way, the end result is the same: some areas get too much, and others do not get enough.
Common signs you may have nozzle issues:
- Uneven coverage or visible striping in the field
- Higher chemical use than expected
- Inconsistent pressure readings or frequent plugging
- Tips that look chipped, worn, or misshapen
A quick check here and there helps you stay ahead of problems before they start costing you time, money, or yield.
Catch test: step-by-step
A catch test is one of the simplest ways to confirm every nozzle is flowing consistently compared to the others.
Step 1: Gather what you need
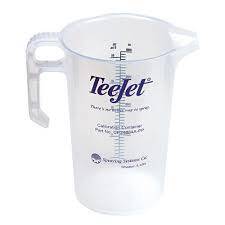
Grab a few basics:
- Clean, dry catch containers (graduated cylinders, catch cups, or marked measuring containers)
- A way to time the test (your phone timer works great)
- Pen and paper or a notes app to record volumes
- Proper PPE for whatever you’re running through the system
Step 2: Set up under the nozzles
Place one container under each nozzle you’re testing. Keep your spacing consistent, and make sure each container is centered under the spray.
Tip: If you’ve got a long boom, it’s totally fine to test in sections. The important part is keeping everything consistent from one nozzle to the next.
Step 3: Run the sprayer like you normally do
Run the sprayer at your typical spraying pressure. If you can safely test while stationary, run the system for a set amount of time so every nozzle gets the same window. A lot of people use 30 or 60 seconds.
Step 4: Measure and record output
Measure what you collected in each container and write it down. Try not to eyeball it. Small differences turn into big ones across a full boom.
Step 5: Compare results
Now look for nozzles that are noticeably higher or lower than the rest.
Simple rule of thumb:
- If a nozzle is more than 10% different from the average of the group, it’s worth a closer look.
What the differences can mean:
- Low output: partial clog, restriction, screen issue, or damage
- High output: worn tip (pretty common over time), missing or incorrect parts
- Odd pattern: misalignment, damaged tip, buildup, or the wrong tip type
Step 6: Fix the problem and retest
Once you spot the outliers, handle them and run a quick re-check so you know you’re back where you should be.
- Clean or replace screens if needed
- Clean tips using the right method (avoid anything that can scratch or enlarge the orifice)
- Replace tips that are worn, damaged, or repeatedly inconsistent
Why replacing tips quickly is worth it
It’s easy to put off a worn nozzle because the sprayer still “works,” but the costs can add up quietly. Over-application wastes product and can stress the crop in spots, while under-application can reduce control where you really need it. Swapping a few problem tips now is usually a lot cheaper (and less frustrating) than chasing coverage issues later.
Conclusion
Nozzle maintenance is one of the easiest ways to protect spray quality and keep your sprayer running efficiently. A catch test takes a little time, but it can help prevent uneven application, cut down waste, and give you confidence that every pass is doing what you think it’s doing.
If you want help picking replacement tips that match your sprayer setup and your application goals, Sprayer Specialties can help you get the right fit so you can get back to spraying with confidence.